Healthy toaster oven PIZZA pockets!
/
Time to make: 15 ish minutes
Time to bake: 5-10 minutes
Skill level: Baby
Recipe and photos by: Alex, The Hungry Wolfe*
If you've ever read the "Meet Alex" page on this site, then you already know I've been a veggie since the age of 7. But not a healthy one, not even close. In fact, I literally didn't eat my first real vegetable (for the purpose of this story, carrots and french fries are not vegetables) until I was about 20. Friends were gobsmacked by the concept that I, a self-proclaimed NON-meat eater, was also a self-proclaimed veggie HATER. Say what? So what do you even eat?
Cheese.
Lotsandlotsandlotsa
C-H-E-E-S-E.
So much so that I had no idea it wasn't normal to need a nap after every meal. But of course not until after I laid in a corner in the fetal position whining to no one in particular, whyyyyyy?
I loved cheese. No, I lived for cheese and my biggest fear when I agreed to eat a plant based diet for 90 days (after attending an all vegan wedding and being offered to watch an eye-opening documentary Forks Over Knives) was as much about giving up cheese as it was taking on veggies.
I mean, we had zero relationship, me and veggies. I was so awkward around veggies and veggies were all confident and robust and I felt like a 13 year old boy on a first date. Where do I put my hands? Should we just talk about our hobbies this first meeting and try mouth to mouth on the second date? I was nervous, because tolerating veggies was the only way to survive these 90 days and I wasn't sure I was going to make it. But I promised myself.
Of course, veggies and I are madly in love now. I also know veggies have so much more to offer than they're given credit for. Little miss veggie has so much more to her than her rough skin and tough crunch. First off, I learned some of the basics, like roasting. I would just cut up a bunch of colorful finds from the farmers market, massage them in olive oil, salt and pepper 'em, then roast a whole cookie (mmm cookies) sheet worth and be set for the next couple of days. For the longest time roasted veggies and some grains (like quinoa or rice) were my go to. I was like "look mom, I'm eating veggies, I'm basically Iron Man." But I was getting capital B BORED. That's when I began reading cookbooks (mostly vegan, but some others too, for inspiration) voraciously. I learned how to cook tofu. I learned how to cook beans and lentils. (All of these are staples in any vegans kitchen, mine included).
HOLD THE PHONE, who even cares about beans and lentils, still totally bored, aren't we?
Then one day I was reading Isa Moskowitz's Isa Does It and there's a section called ABS. And I was all ewww ABS in a cookbook? And then I was like, oh wait that's IBS. What's ABS? Turns out it's the best advice I ever got, and my whole vegan world changed forever:
Always
Be
Soaking.
Soaking what? NUTS, betch. Cashews in particular. Most homemade vegan healthy cheeses are made from blending soaked cashews with spices and things like...
Nooch!
What the fuck is Nooch? Right, it's vegan for Nutritional Yeast, which can be found in the aisle where Bob's Red Mill products live (if you are shopping at a regular old grocery store and not a whole foods or other health food market - if you can't find it just ask. Or, you can order it here).
My world was expanding and I was no longer limited to rice and beans and veggies (ironically, still one of my favorite go-to meal options. Probably, because I also have other options now). The 90 day challenge of being vegan is still going...six years and 41 days later, and I have never once looked back. People ask me if I miss cheese, me the cheese-a-holic who literally ate nothing else but cheese, and the answer is HELL. FUCKING. NO. WAY. I feel better, I look better, and most importantly I'm not contributing to the suffering of animals (PS. this is putting it so lightly it's almost animal cruelty). Every day that I cook myself an elaborate vegan meal I marvel at what I've made and where it came from. It just keeps blowing my mind in the best possible way. I'm glad to be on, what I believe, is the right side of history. Come have some "cheesy" pizza pockets with me and see if you're ready to make the change today. And if you're already there, HOW GOOD ARE THESE VEGAN CHEESE POUCHES? Comment below, like, and share so we can show people how easy, inexpensive and delicious this lifestyle is.

INGREDIENTS:
4 slices vegan Bread (White, Wheat, Sourdough, or Multigrain should work well here)
4-6 slices vegan cheese (I used Chao by Field Roast. Other options include: Daiya, Kitehill, Violife, Follow Your Heart, Miyoko's, Go Veggie ... need more options? Email me!)
Vegan pepperoni slices (or you can substitute grilled onions and peppers or mushrooms or other veggies). For a gluten and soy free option I use Yeah Dawg Vegan sausages and cut them into pepperoni slices - If you live in a remote area, looks like you can order them in bulk on line!
2 heaping spoonfuls of pizza/marinara sauce
1 Tablespoon all purpose gluten free flour blend
Water
DIRECTIONS:
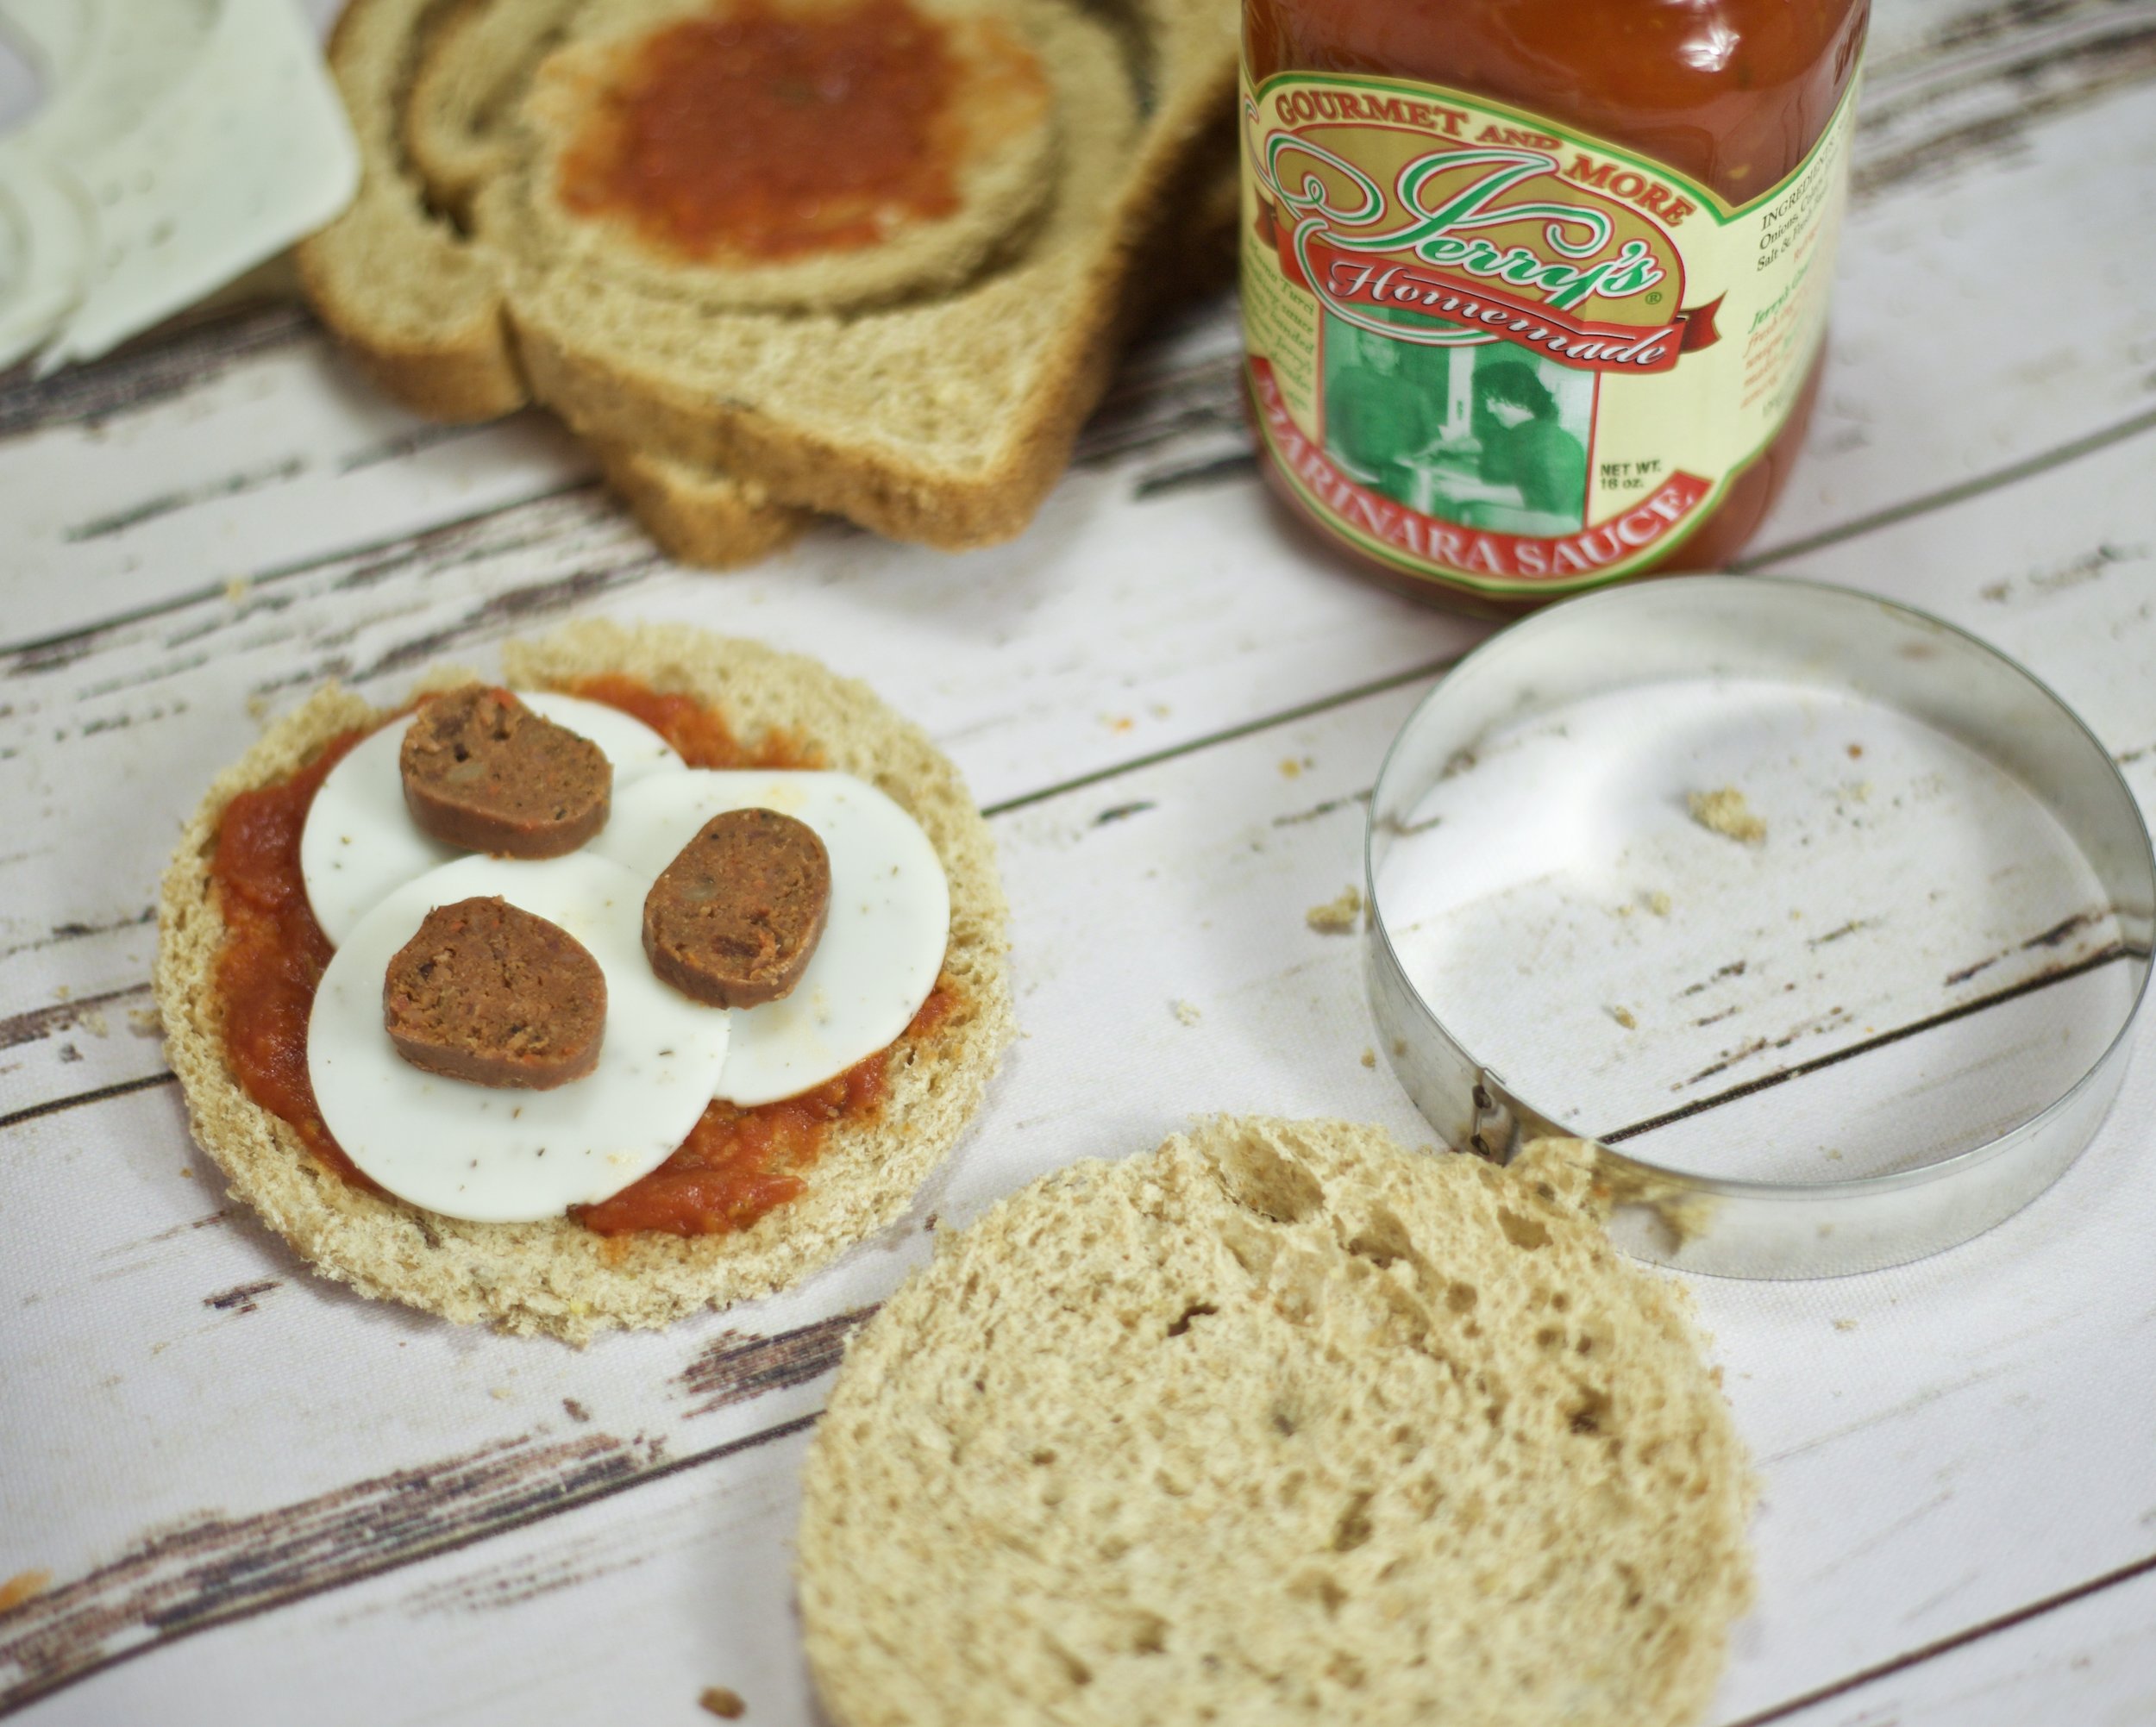
I used a large circular cookie cutter to cut the 4 pieces of bread into rounds, but you can also use a regular kitchen knife to cut the crusts off. Your pockets will just be rectangular instead. Cool!
Next, add a dollop of the marinara sauce and spread around the bread leaving a half inch space around the edges.
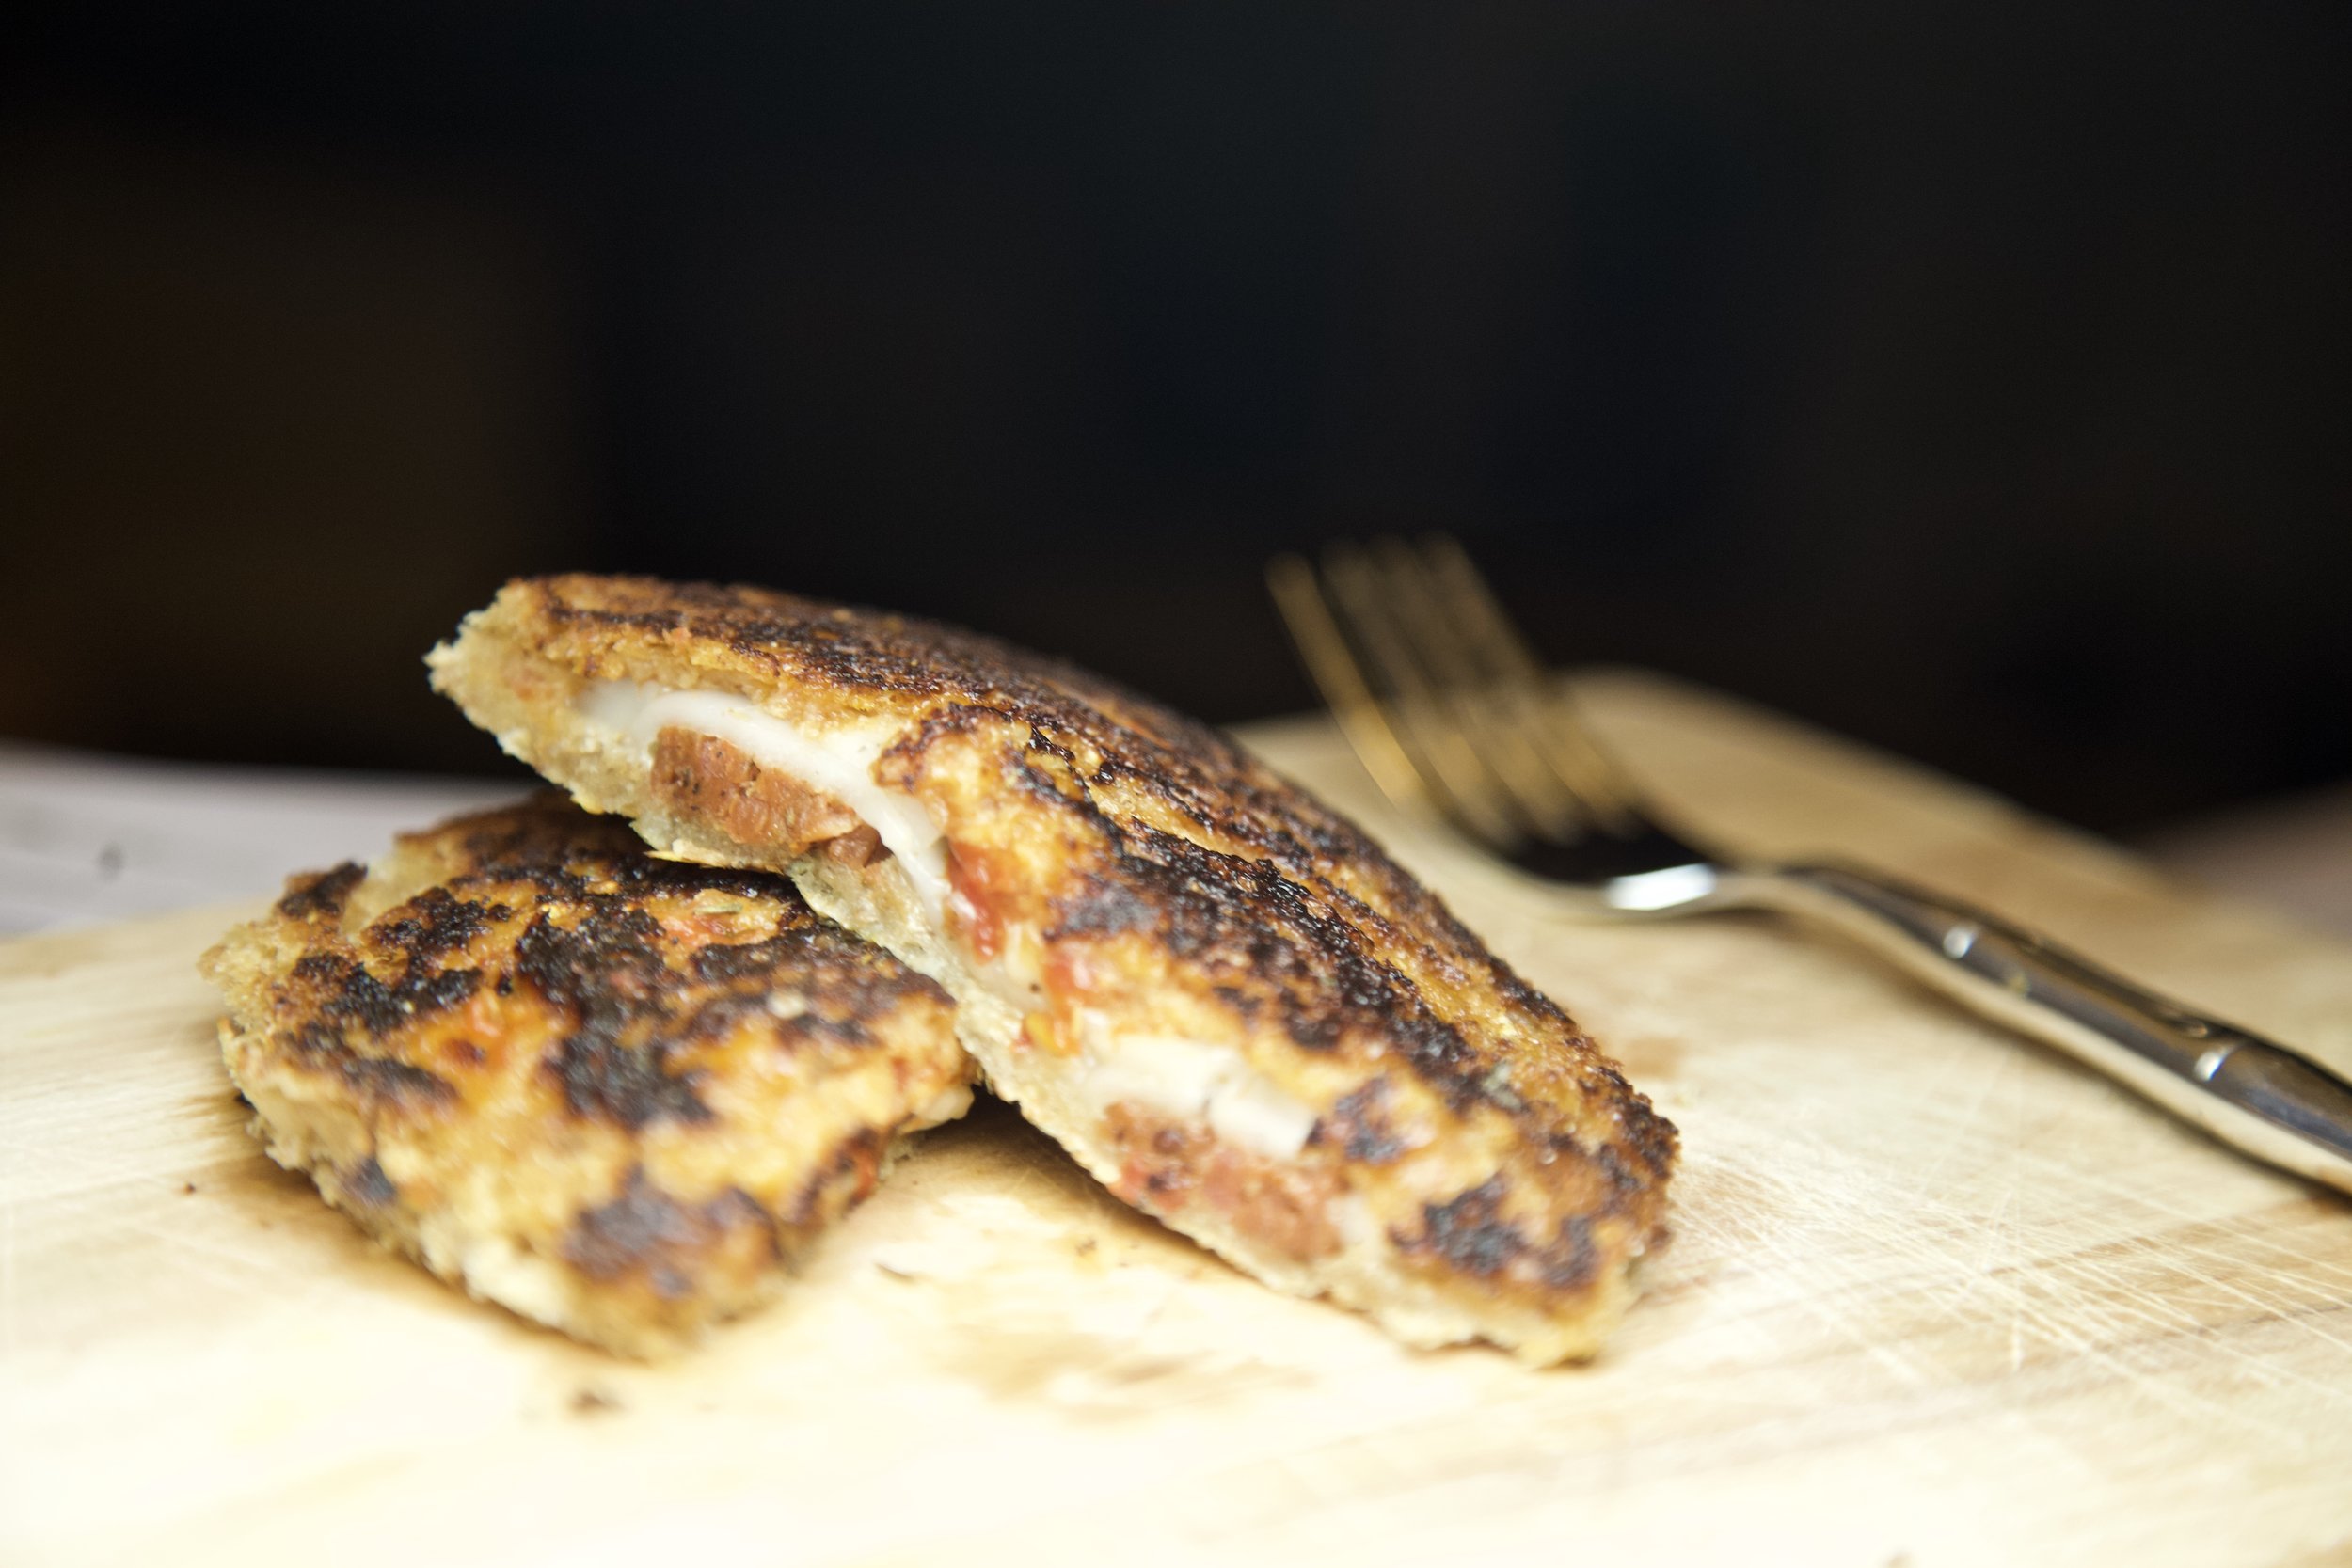
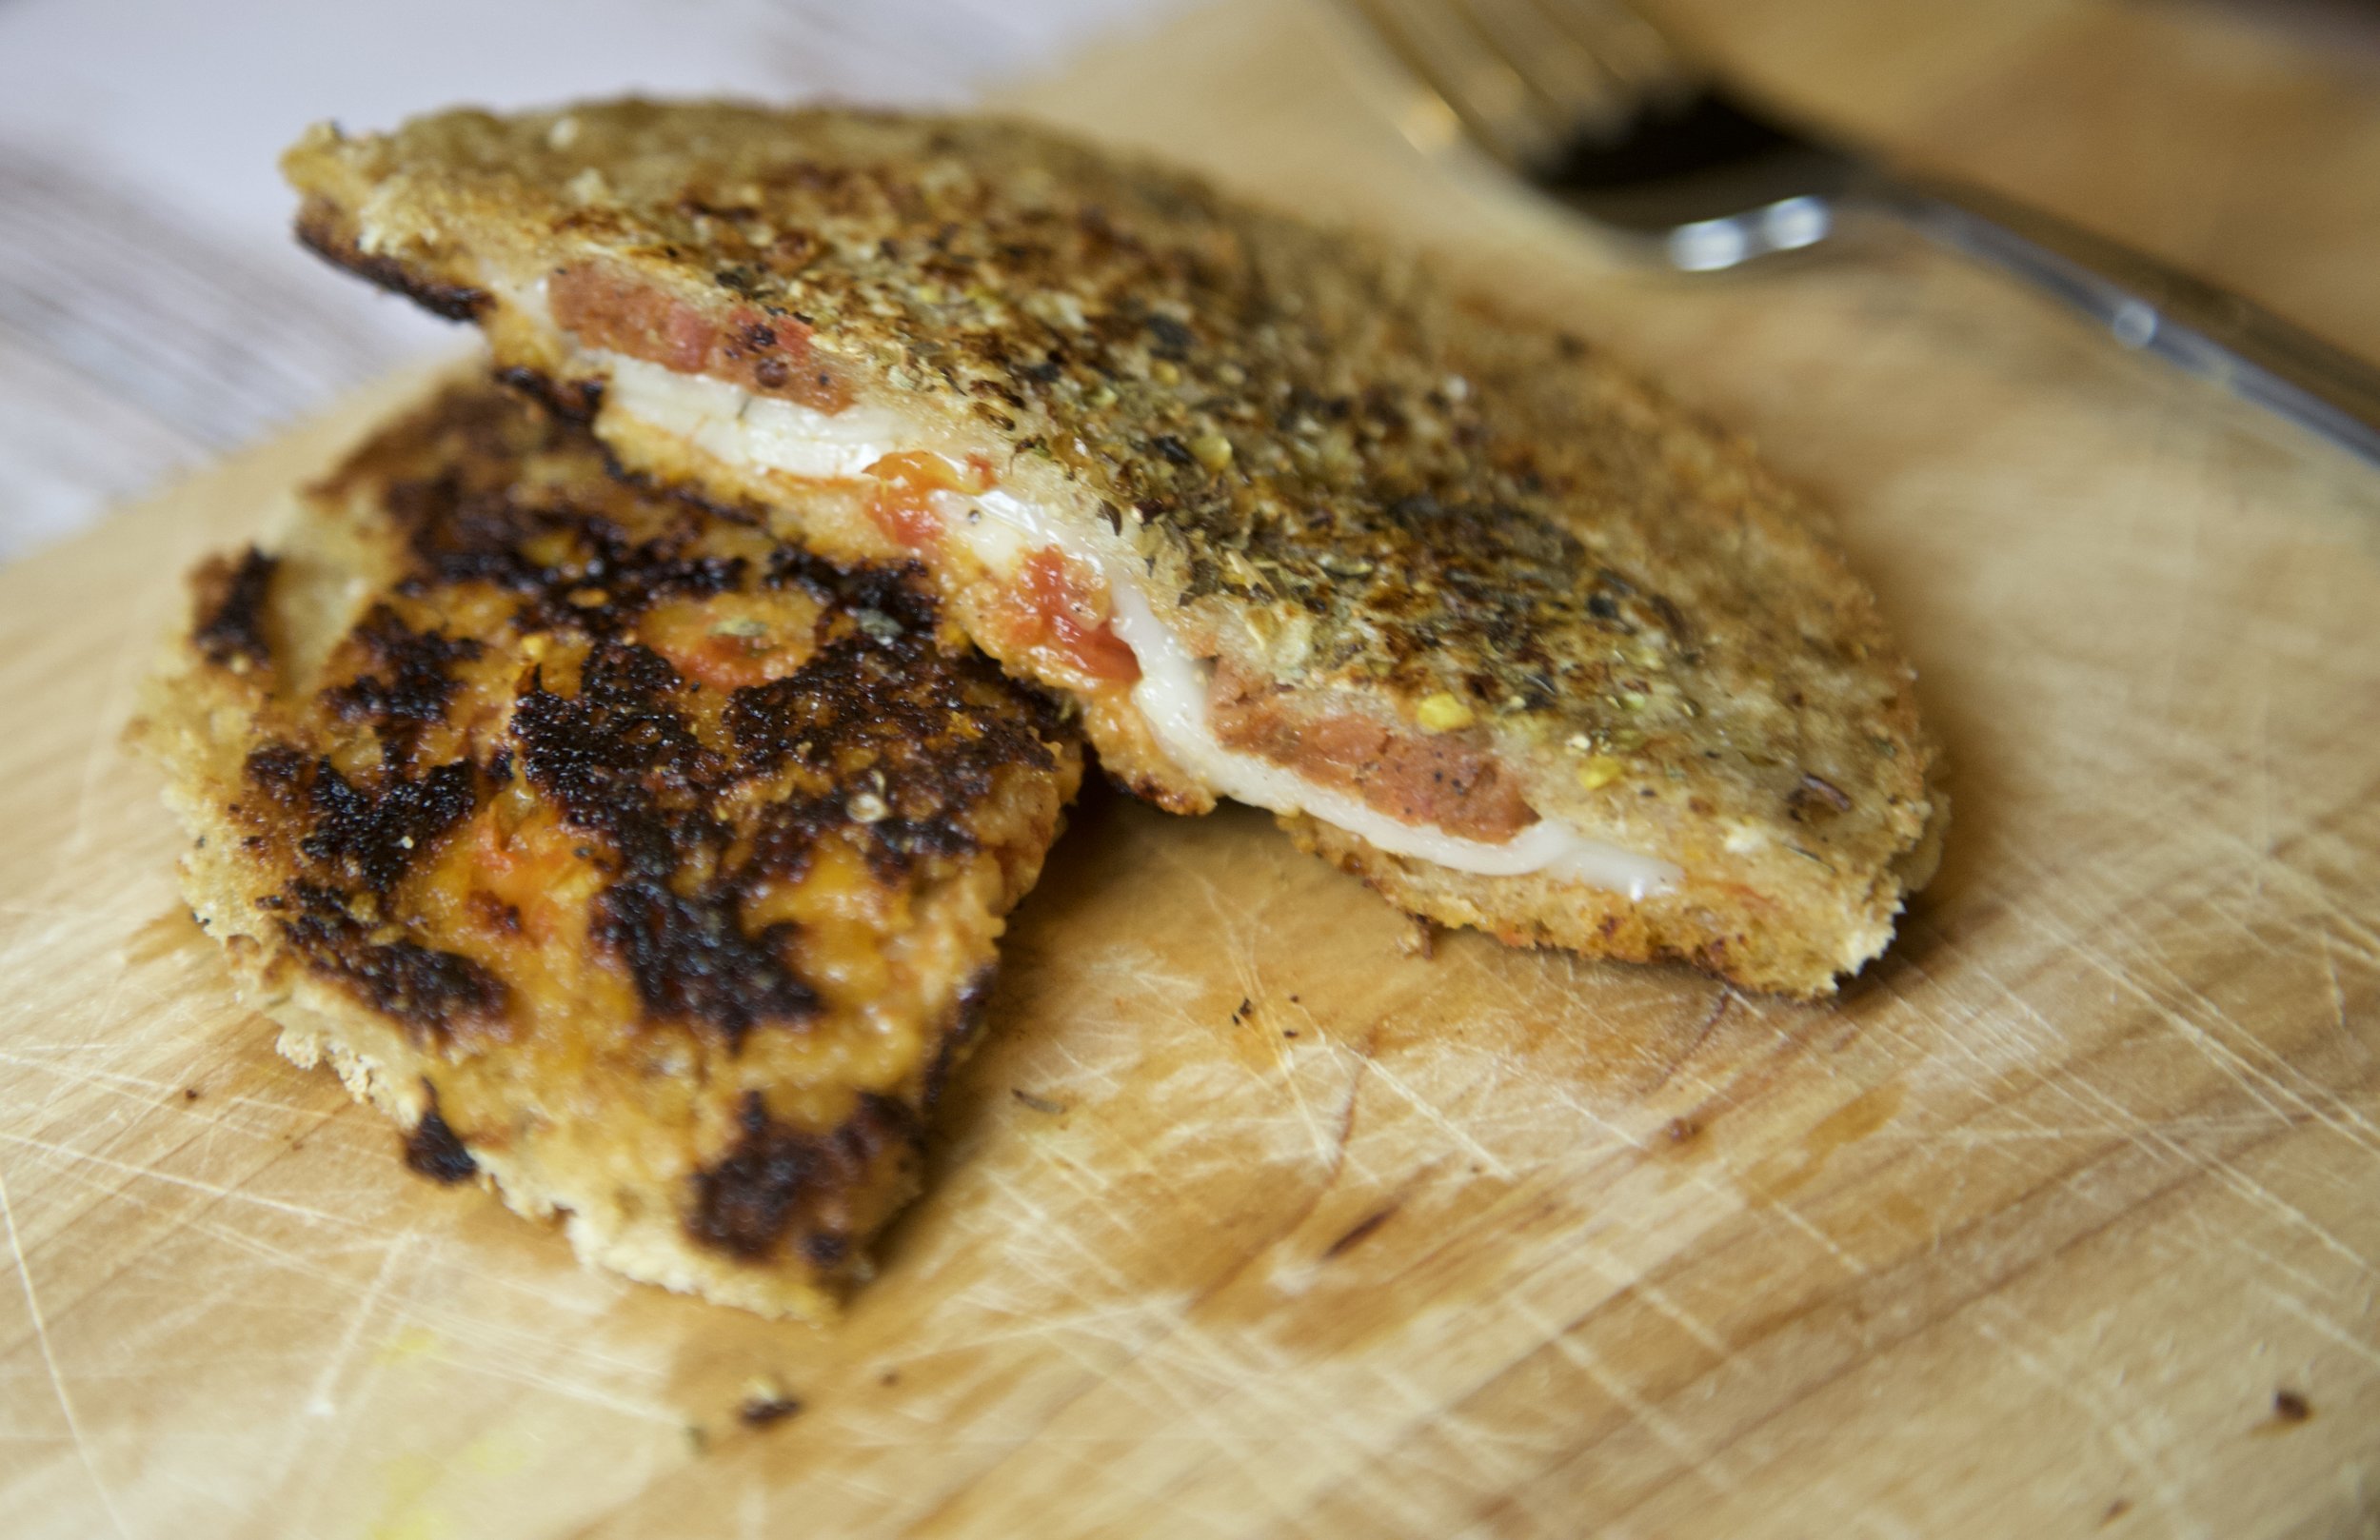
Add 1-2 slices of cheese (you may need to break it apart if you're not using shreds, to account for that 1/2 inch edge we need).
Lastly, put the pepperoni slices on top of the cheese. So far your pizza should look like the first picture.
Now, in a small bowl mix the flour with just enough water to form a thick paste.
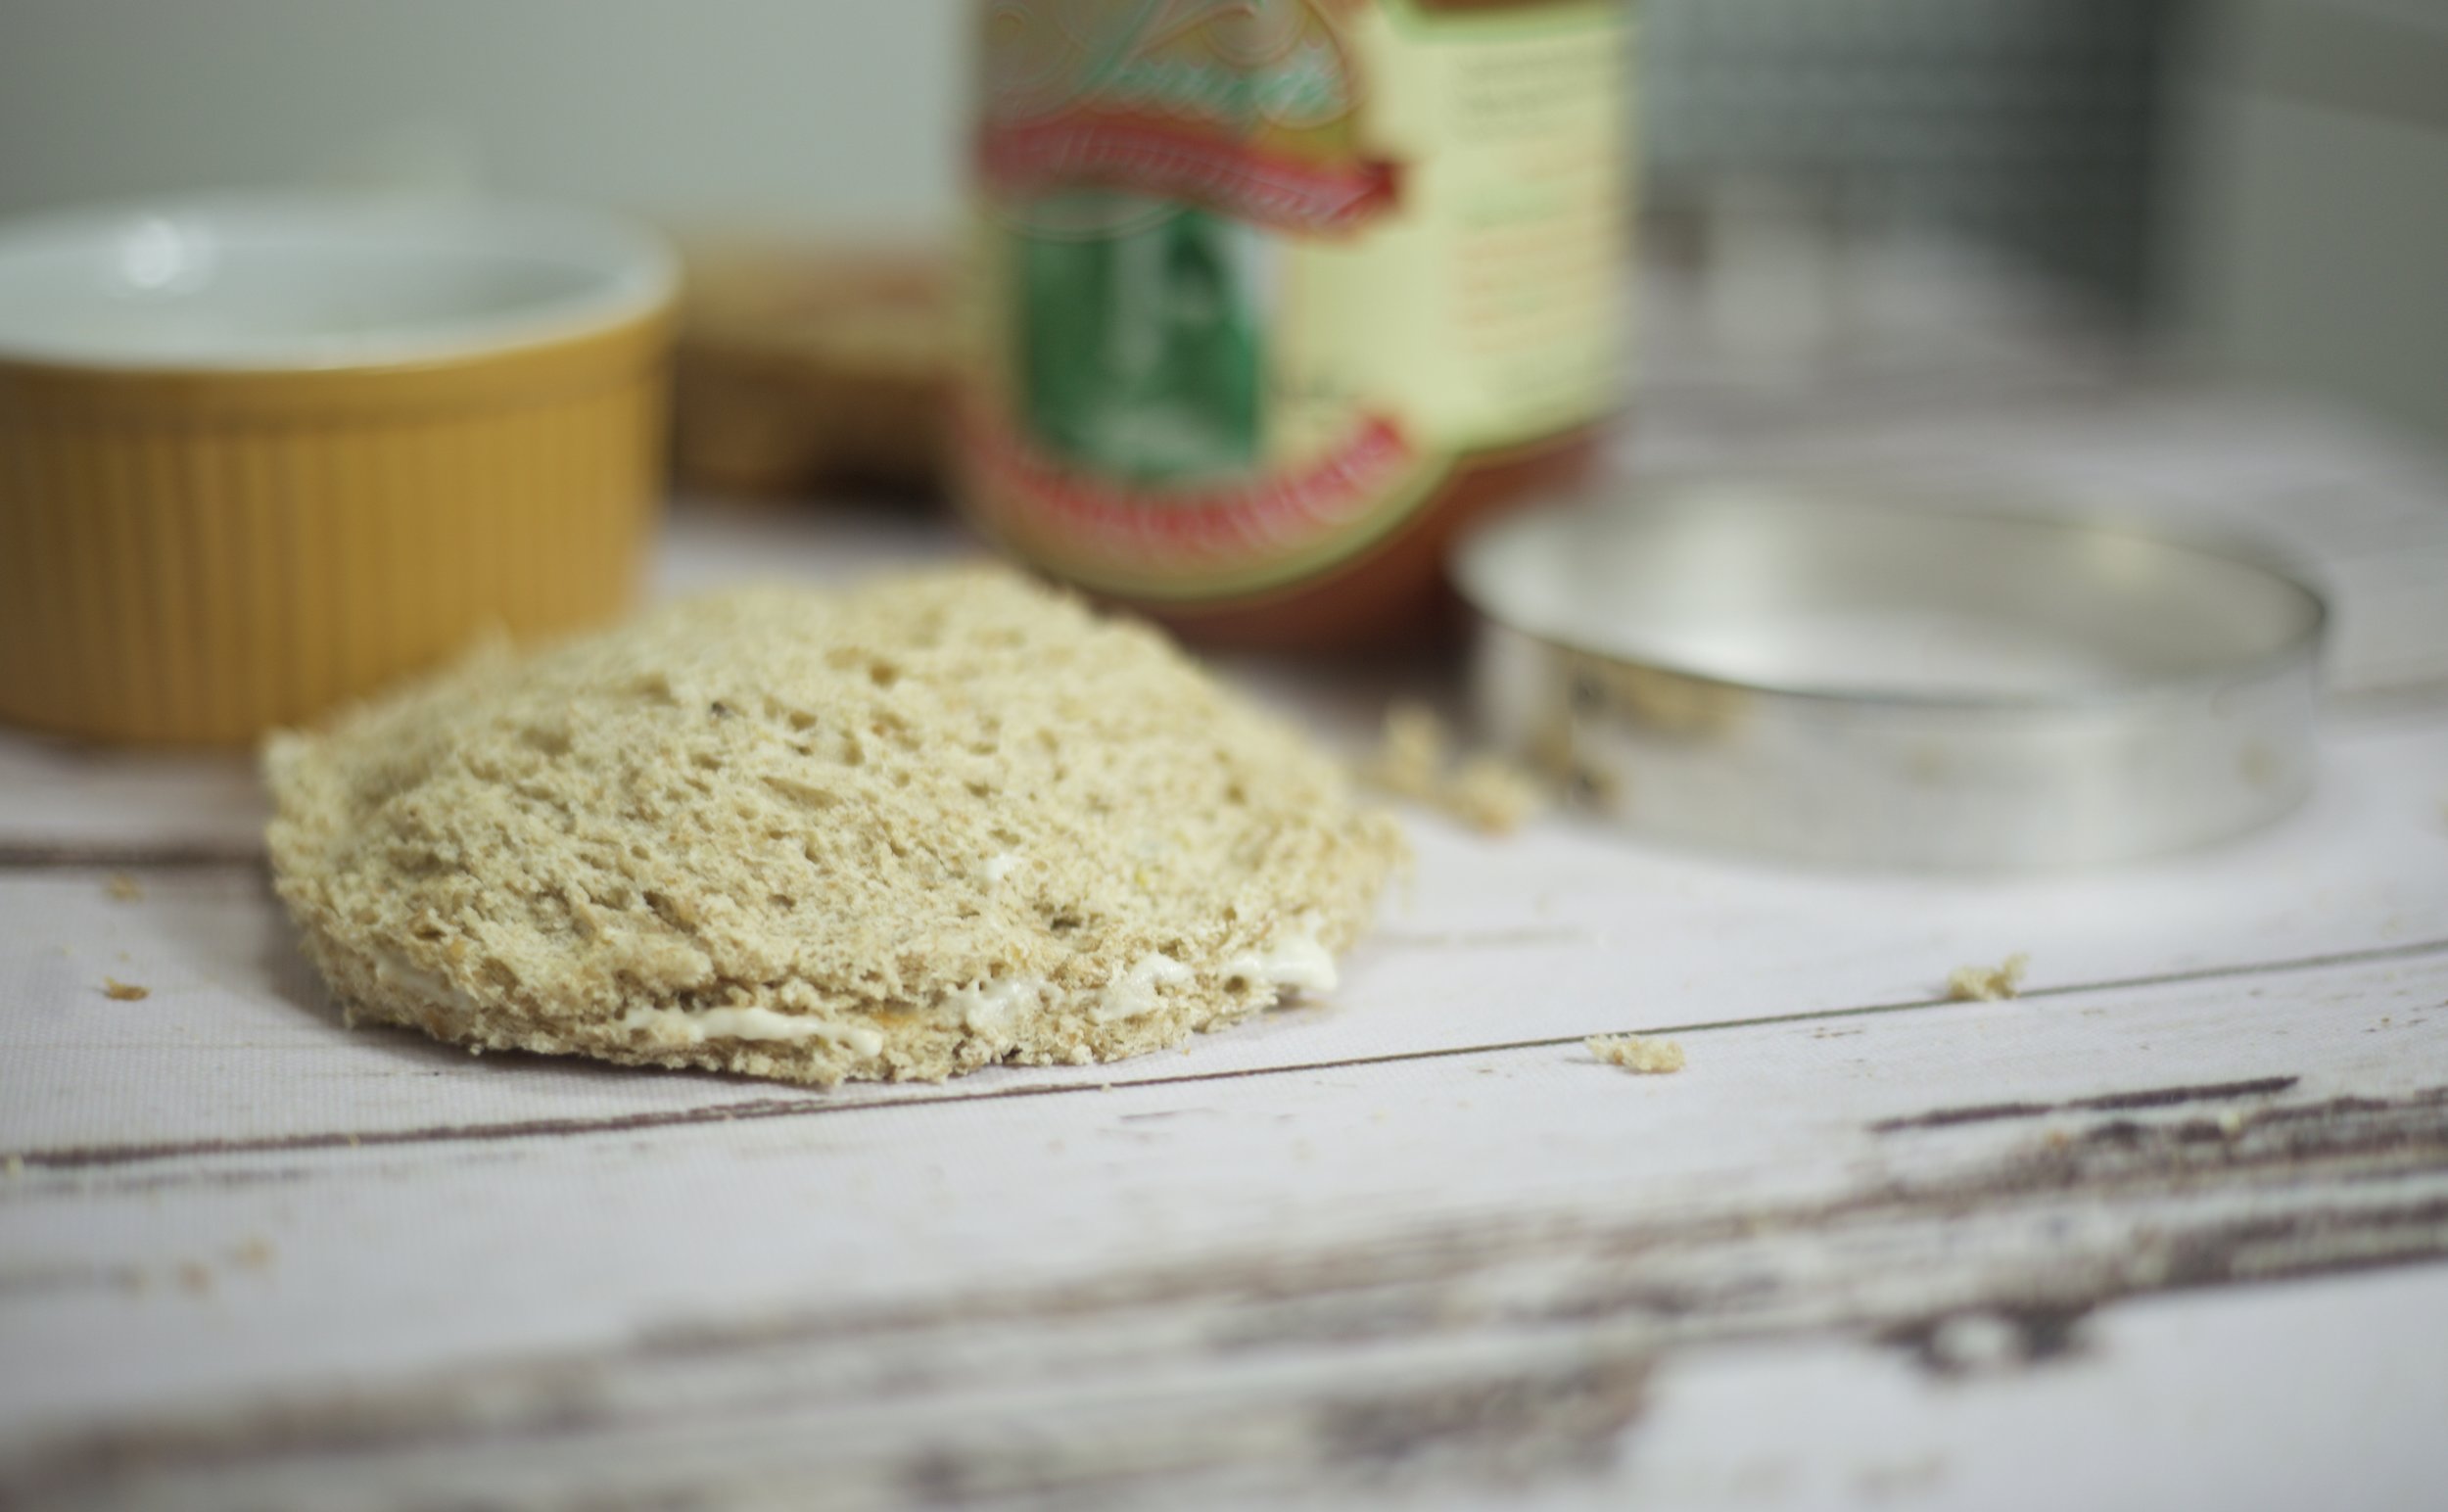
Using your finger, take the paste and line that 1/2 inch edge all the way around. Take your other piece of matching bread and gently place on top. Again, using your fingers, pinch the edges so they lock shut.
Sprinkle some oregano on top if you have it.
Your pizza pocket is now ready for:
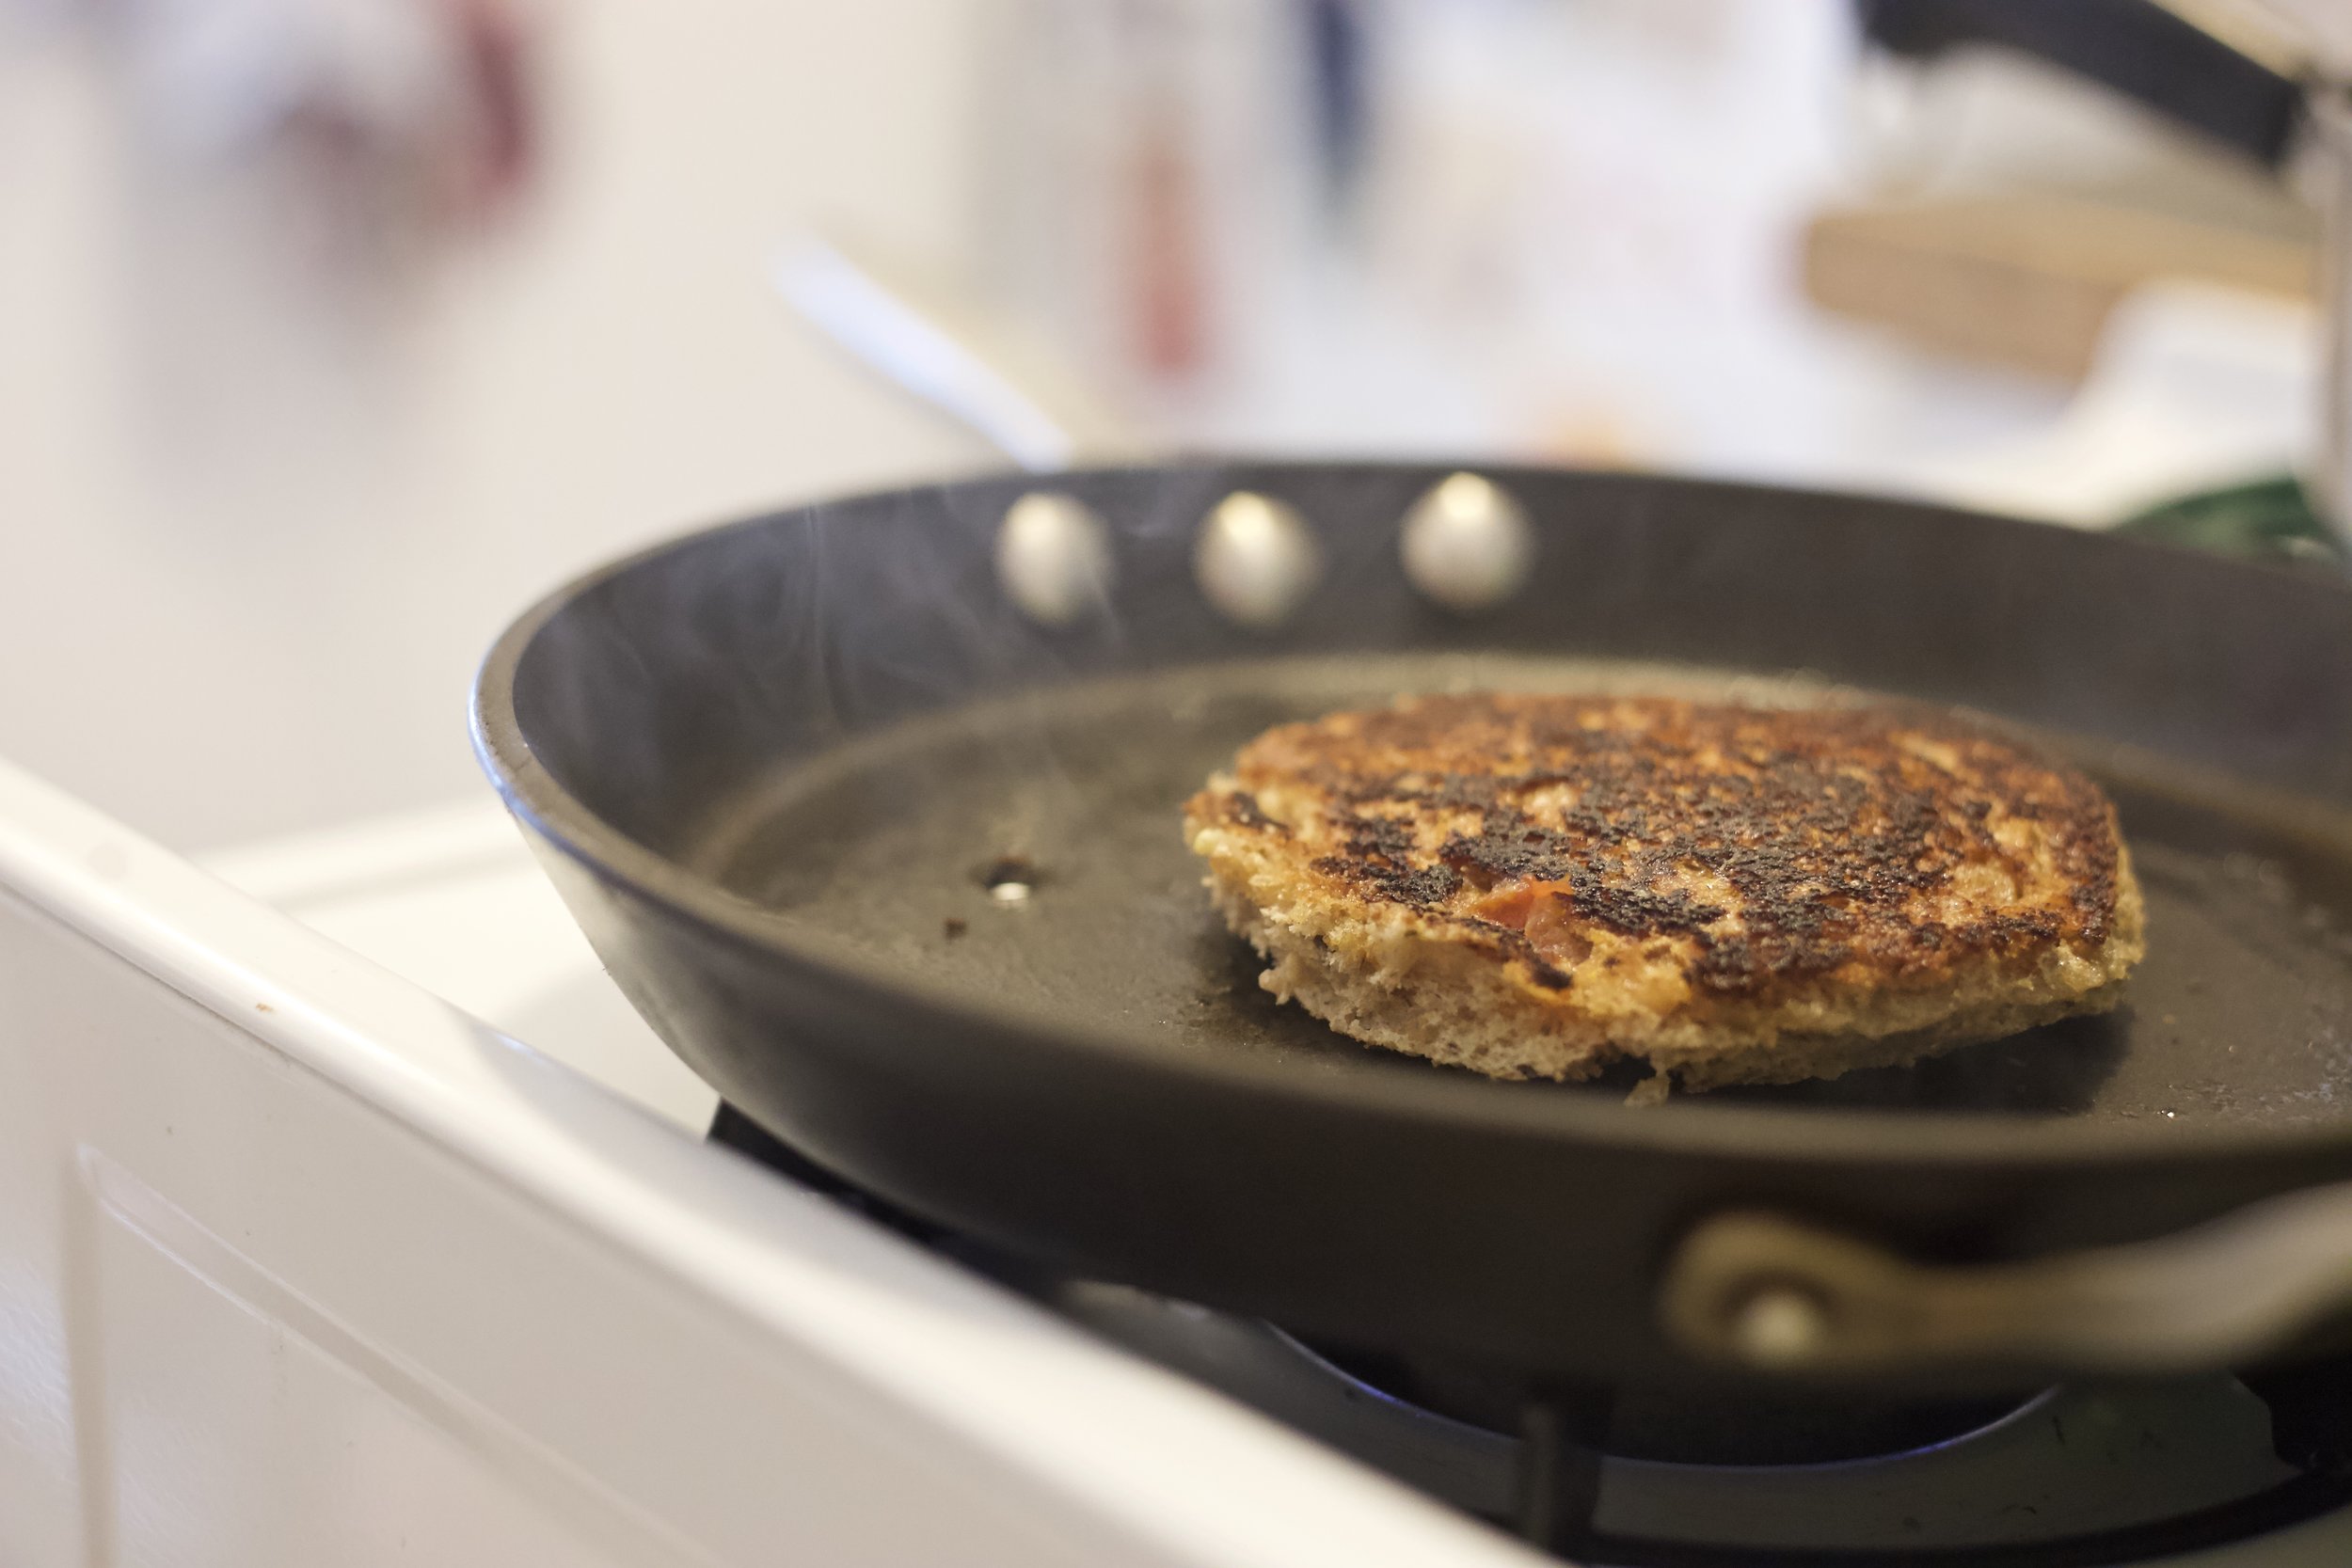
A toaster (medium setting to start, making sure to check it periodically; you want to make sure the cheese doesn't melt into your toaster, so keep your peepers on it).
Toaster oven (350º for about 10 minutes, flip sides in the middle)
or a non-stick pan (same as toaster oven).
*Recipe inspired by @jungletwisted